
** Important Safety Notice **
Replacing a windshield on an RV or motorhome should be handled by trained professionals with specialized tools and experience. RV windshields are extremely large, heavy, and play a critical role in vehicle safety and structural integrity. Improper removal or installation can lead to serious injury, glass failure, water leaks, or compromised visibility while driving. Attempting this work without professional training and equipment carries significant risk and often results in costly damage. For safe, proper installation, professional RV windshield replacement services such as SLP Autoglass (https://slpautoglass.com/) are strongly recommended.
How to Replace a Windshield on an RV or Motorhome
How to replace a windshield on an RV or motorhome involves careful planning, proper materials, and precise installation techniques. Unlike standard vehicles, RVs and motorhomes use oversized windshields that require specialized handling, adhesives, and alignment. Understanding the replacement process helps RV owners recognize what is involved and why professional service is often the safest and most reliable option.
RV windshield replacement is not a quick task. The size, curvature, and mounting system all affect how the glass must be removed and installed to ensure long-term durability and safety.
When an RV or Motorhome Windshield Needs Replacement
Certain types of damage make windshield replacement unavoidable. Driving with compromised glass increases safety risks and can worsen structural problems.
Situations requiring full replacement
- Cracks extending across the windshield
- Damage reaching the edge of the glass
- Multiple impact points or spiderweb cracking
- Distorted visibility while driving
- Water leaks caused by seal failure
Because RV windshields contribute to cab rigidity, even small issues can escalate quickly if left unaddressed.
RV and Motorhome Windshield Designs
Windshield design varies depending on RV class and manufacturer. Knowing the configuration helps determine installation complexity.
One-piece and two-piece windshields
- One-piece windshields
Common on Class B and some Class C motorhomes. Easier to align but still extremely heavy. - Two-piece windshields
Frequently used on Class A motorhomes. Each side must be aligned precisely at the center seam.
Flat versus curved glass
Flat glass is simpler to install, while curved windshields require exact positioning to avoid stress cracks and wind noise.
Tools and Materials Used in RV Windshield Replacement

RV windshield replacement requires professional-grade tools designed for large automotive glass.
Common tools and materials
- Heavy-duty suction cups
- Windshield cutting wire or cold knife
- Trim and molding removal tools
- Automotive urethane adhesive
- Glass and frame primer
- Setting blocks or spacers
- Protective gloves and eyewear
Using incorrect adhesive or tools can result in poor bonding and premature failure.
Preparing the RV for Windshield Removal
Proper preparation prevents damage to surrounding components and improves installation results.
Preparation steps
- Park on level ground
- Disconnect the battery
- Remove windshield wipers and trim
- Cover dashboard and interior surfaces
RV dashboards are large and expensive to repair, making protection essential during removal.
Removing the Old RV Windshield
Windshield removal must be done slowly and evenly to avoid frame damage.
Removal process
- Cut through the existing adhesive carefully
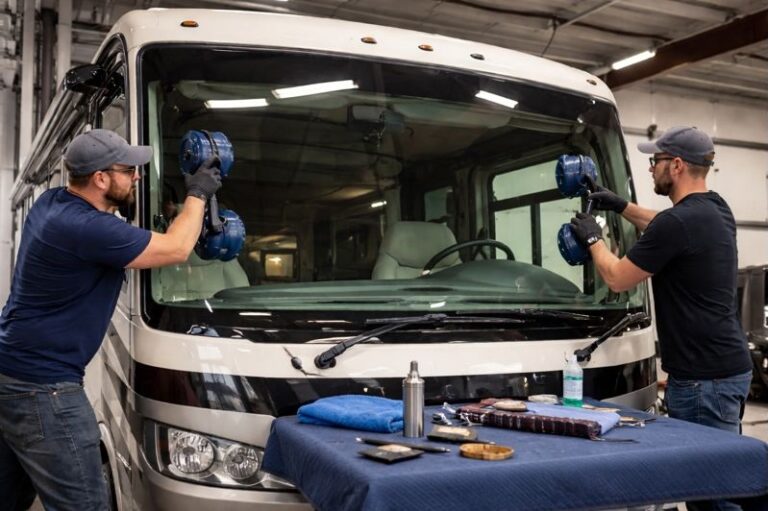
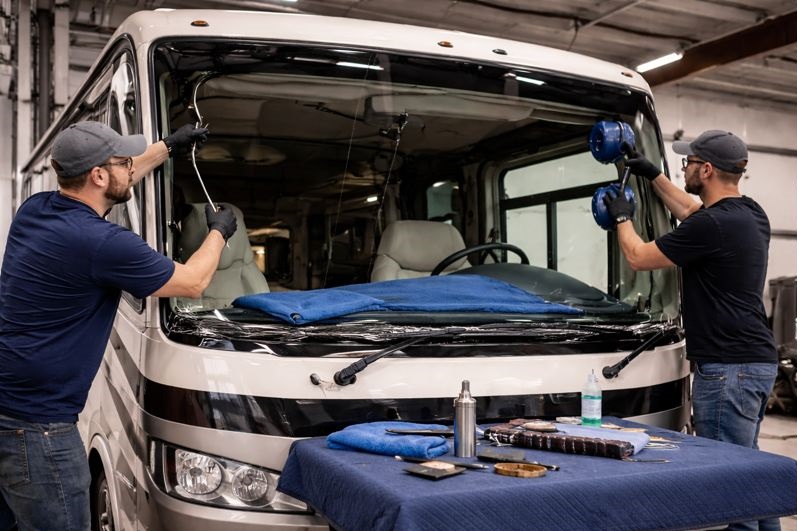
- Support the glass with suction cups
- Lift the windshield evenly from the frame
- Dispose of damaged glass safely
Large RV windshields often require multiple technicians due to weight and size.
Inspecting the Windshield Frame
Once the windshield is removed, the frame must be inspected thoroughly.
Frame inspection checklist
- Look for rust or corrosion
- Check fiberglass or metal for cracks
- Remove all old adhesive residue
- Ensure a clean, dry surface
Ignoring frame issues can cause leaks and weaken the bond of the new windshield.
Applying Primer and Adhesive
The adhesive system is one of the most critical elements of RV windshield replacement.
Proper application steps
- Prime the windshield edge
- Apply primer to the frame if required
- Lay a continuous urethane bead
- Maintain consistent bead thickness
Uneven adhesive application can cause air gaps, leaks, or glass stress.
Installing the New RV or Motorhome Windshield
Setting the windshield requires precision and coordination.
Installation techniques
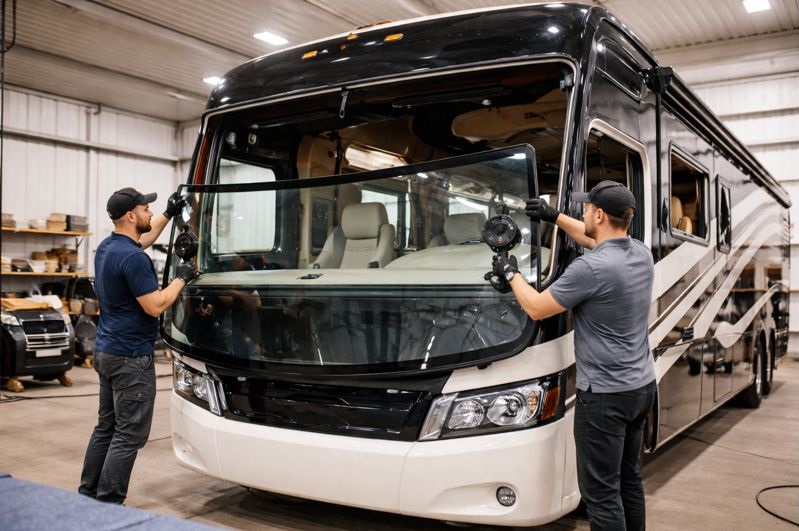
- Lift the glass using suction cups
- Align carefully with factory reference points
- Press evenly into the adhesive
- Use setting blocks to maintain spacing
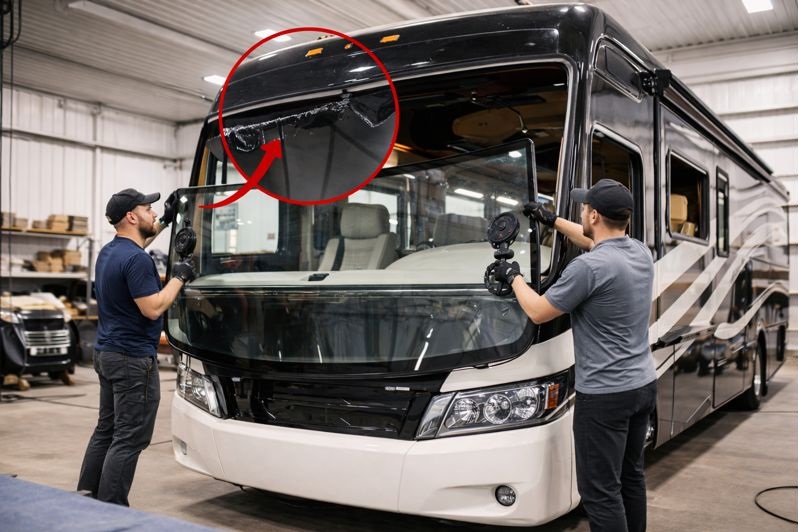
For two-piece windshields, center seam alignment is especially important to prevent wind noise.
Reinstalling Exterior Components
Once the windshield is set, trim and exterior components must be reinstalled correctly.
Reinstallation steps
- Replace moldings and trim
- Reinstall windshield wipers
- Ensure tight, uniform fit
- Check for visible gaps
Poor trim installation can expose adhesive to moisture and UV damage.
Curing Time and Initial Care
Adhesive curing time is essential for long-term performance.
Curing guidelines
- Follow manufacturer curing recommendations
- Avoid driving during initial cure time
- Keep doors and windows closed if required
- Do not wash the RV for at least 24 hours
Driving too soon can cause windshield movement and weaken the seal.
Common Mistakes During RV Windshield Replacement
Even small mistakes can lead to costly repairs.
Mistakes to avoid
- Using household adhesives
- Skipping frame preparation
- Uneven adhesive application
- Insufficient curing time
- Attempting solo installation
RV windshield replacement is unforgiving. Precision is critical at every stage.
Cost Factors for RV Windshield Replacement
Replacement costs vary based on several factors.
Cost considerations
- RV size and class
- One-piece or two-piece glass
- Curved windshield design
- Labor and installation complexity
- Mobile versus shop service
Class A motorhomes often have higher replacement costs due to glass size and handling requirements.
Professional Installation vs DIY Replacement
Many RV owners consider DIY replacement, but professional service offers significant advantages.
Benefits of professional installation
- Specialized tools and trained technicians
- Proper adhesive and primer systems
- Reduced risk of leaks or glass failure
- Workmanship warranties
Professional RV windshield replacement services like SLP Autoglass ensure proper installation and long-term safety.
Safety Considerations During Replacement
Handling oversized glass presents serious safety risks.
Key safety precautions
- Wear protective gloves and eyewear
- Never lift glass alone
- Secure ladders or work platforms
- Keep the area clear of bystanders
RV windshields require controlled handling to prevent injuries and damage.
Windshield Longevity After Replacement
A properly installed RV windshield can last many years.
Factors affecting lifespan
- Driving conditions
- Road debris exposure
- Climate and temperature changes
- Quality of installation
Routine inspections help identify early signs of seal wear or damage.
Signs of Improper Installation
Monitoring the windshield after installation helps prevent long-term issues.
Warning signs
- Wind noise at highway speeds
- Water leaks during rain
- Visible adhesive gaps
- Glass movement or shifting
Early correction prevents more extensive repairs later.
Replacing a windshield on an RV or motorhome requires specialized knowledge, equipment, and precision. From safe removal and frame preparation to proper adhesive application and curing, each step directly affects safety and durability. Understanding the process helps RV owners make informed decisions and reinforces why professional installation through trusted providers like SLP Autoglass is the safest and most reliable approach for RV windshield replacement.
Content reviewed and published by SLP AutoGlass Editorial Team.